Tuesday, April 29, 2014

What Really Counts and What Really Makes Cents.

 
Week two of our bathroom remodel brings us one of my favorite parts....the guts! I love opening up walls to find out what's inside. It speaks so much about the care that was, hopefully, taken and what needs to be done if it hasn't been done already.


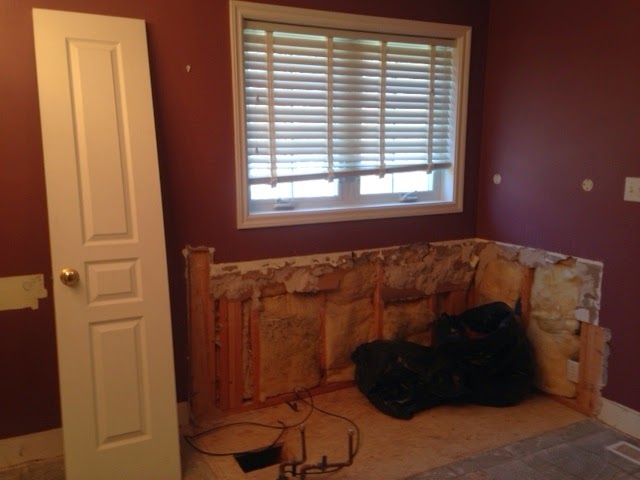
Something I love to see here is that even though most of these walls are interior, you will notice that there is still insulation.


Insulation isn't just for temperature control, it also acts as a sound barrier, which can be a really important feature in a bath reno.


Whenever you open walls, take the opportunity to examine your insulations. Is it adequate for your interior and exterior walls? If not, now is the perfect time to beef it up! If you don't have extra room, consider spraying in some extra and don't forget to spray around those medicine cabinets.

 
If you live in an older home and open up a wall and find that the studs run all the way up the walls (balloon framing), by code, you must put horizontal blocking in to prevent the quick spread of fire. The devastating fire in Boston and the recent church in Newfields might have been aided by this life saving structural change.

Also make sure you have horizontal blocking for anything you are handing up such as towel racks, toilet paper holders, medicine cabinets and showerheads. So much nicer than trying to find those "never placed in the right place" studs later on. Also, I love to see a clean, safe place.

Make sure your contractor takes proper precautions to insure your safety and a healthy living environment. Completely covering the flooring and installing plastic zip walls cuts down on the wear and tear to walls and floors.


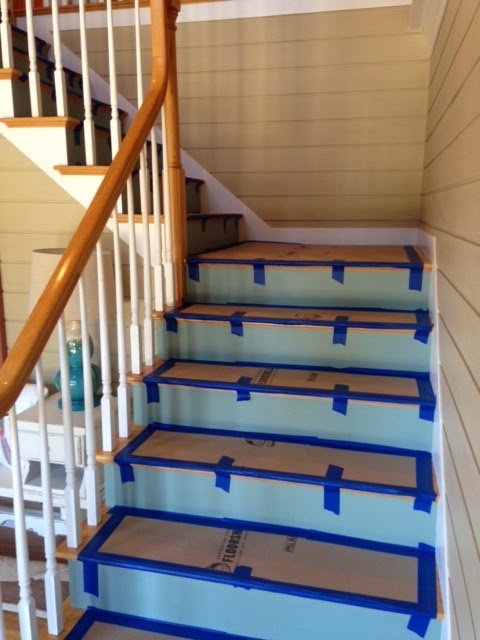
Another wonderful feature is the particulate removal machine that helps pull out the dust and allergens, ensuring healthier breathing.


So let's talk a moment about BUDGET. My husband once warned me never to tell them the budget because they will always find a way to spend it. A good contractor or designer will use your budget to help realize your dreams and your realities, and there are always realities...!

Building a bathroom or kitchen is like making a small house. You have to tap into all the systems, i.e.; electrical, mechanical, plumbing, and finishes, to make it work. Sit down with your designer and talk about the non-negotiables, the nice to haves and the reaches. Kind of like applying for colleges. You also don't want to be looking at stuff that you know you simply cannot have. Take into consideration ROI. According to the +National Association of Home Builders, a new bath can increase the value of a home by 20%. On a renovation, one can expect to recoup about 60% of costs. Go to www.remodeling.hw.net to plug in your area and get resale values for the most common improvements such as kitchens, baths, even generators!

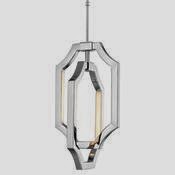
There are items to purchase at every price point. Some are fine to negotiate on such as lighting. Can we find something that looks that opulent, but for less?


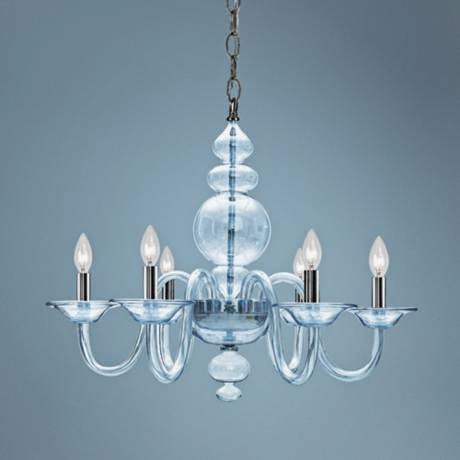
Either of these stunning options gives us the look we want, but at a fraction of the cost of our original design.
 
Some things should not be compromised, such as plumbing fixtures. Look alikes from box stores can have the same name but use all plastic parts inside, hence keeping the cost down, but compromising the integrity and lifespan of the product.
 
Budgets always need to be fluid. Count on the 20/20 rule. Twenty percent more for mid-stream changes and/or things that may be encountered along the way. Also plan for it to take 20% longer. That way you can be pleasantly surprised when you are on time and on budget (and have the satisfaction of knowing you would be the first project to accomplish that!).
 
On our own project we sheetrock this week and start the pretty stuff...tiling. We will post some more pics next week on our progress. So far, so good!
 
Best,
 
Renee!


Tuesday, April 22, 2014

A Reno by Any Other Name?


I have to admit, I do love those reno blogs like +Young House Love and have toyed with the idea of documenting one of our own projects from start to finish, but I am always dogged by the same few details that no doubt lead to my demise, namely progress photos and time. It’s kind of like the lack of photos of my third child (I have four, but the last is a girl, so well you get the idea)…I was too busy participating to actually document.

But, patience is nothing if not patient, so I am committed to the idea (and my tireless assistant is committed to keeping me committed, if not in fact committing me) and we are excited to bring you along on our latest master bath renovation.

Baths are probably some of my absolute favorite projects. They combine romance and practicality. They are space challenged yet have high expectations for that space and beg for the occupants to linger when most want nothing more than to get on with their day.  I love when I can transform a utilitarian space into one of the most desired places in the home.


For this client, as with many, organization was a top priority. There is just so much “stuff” in a bathroom that it’s easy to get overwhelmed. Before we start I always like my clients to do a cleanse. Get rid of everything in that is not associated with the room.

Do you put on your makeup in the bathroom?
Do your kids take baths in the master?
Do you really need 14 towels in that closet?

Prioritize. That way we are designing for what you need, not what you don’t.

Next we review the list of “Must Haves”.

More cabinet space?
A place to do make up?
A soaking tub?
A shower built for two?

For this project I was so excited that we all had the same thing on our “Must Haves”… A fireplace. A two-way fireplace that peeked from the master bath into the master bedroom. What made this a challenge, and a joy, was that we could not build a fireplace or direct vent a gas fireplace. We need something that could be built right into the Sheetrock, was self contained and environmentally friendly.

We landed on a stunning two-way bio ethanol Eco-smart fireplace with a ribbon flame. These are easy to install (professional installation is recommended) and even easier to maintain and clean. Ours will have a niche for the TV on one side and niche for candles and treasures on the other. Simply perfect.

 
From here we will add a new tiled walk in shower with an alcove so we can avoid sometimes costly glass shower doors, ample storage and a variety of lighting that will be both functional (a hardwired makeup mirror will cantilever out from a cabinet) and beautiful.


This exquisite chandelier from Curry and Company will stand at attention in between the double sinks and reflect light back into the room using the plate mirror behind.


Other practical perks such as hidden electrical plugs in cabinets and drawers allow us to free up valuable counter space and keep clutter at bay.

So, what do you need to know before you start down this renovation path?

Next week let’s chat about the “B” word....BUDGET, plus what to expect from your team and what makes the difference between a “Dream Renovation” and “Nightmare” and why it’s so important to pay attention to your insides!

Also, feel free to share your bathroom renovation stories with me (not too many nightmares please, they keep me up at night!) and I’ll try to feature them as well.

Best,

Renee

Tuesday, April 15, 2014

Orange is the new black....


And I'm not talking about the latest book or TV show! I'm talking about getting a bit more daring with your design. Sure black is a mainstay and a great anchor to your décor, but orange can really pack a punch and take your design up a notch! 

Each month +Pantone  selects a new color of the month. April happens to be Celosia Orange, Pantone # 17-1360. What was once considered a fall color is making an appearance this spring! It's fun. It's fresh. And maybe a bit unexpected...This cheery tone is the perfect pop of color for springtime, wouldn't you say?

Some of my favorite paint colors happen to be orange! For this fun summer cottage I used +Sherwin Williams  Serape SW 6656.


 Not sure what to pair with your favorite shade of orange without feeling like it's Halloween? There are more possibilities than you may think! Orange pairs beautifully with blues, greys, reds, hot pinks, turquoise and more! Here I used +Benjamin Moore Paints AF 230 Buttered Yam for the upper portion of this dining room.

Need some more inspiration? Check out +This Old House this month! I think you'll find yourself falling in love with this sassy color. Here are a few of my favorite featured photos.


This is one of my favorite ways to treat a fireplace and really make it a focal point in your room. Many people don't think to paint the brick surround, but it can really make a difference, as you can see here.

Recently I found these fun appliances from Big Chill! Oh how I dream of incorporating these into a kitchen design for one of my clients! They are retro, and hip all wrapped up in this spicy shade of orange.


However, if you can't quite commit to a fresh coat of paint or a new set of appliances, try something a little more subtle. I was in search of some really fresh and fun fabrics for one of my current clients and came across these from +Duralee.

This guy is my favorite. Love, love, love the octopus! I must, and I mean MUST use this fabric for one very lucky client. Who's in??


 Why not try incorporating some orange into your home? Let me know how it goes and I promise I won't say "Orange you glad you tried it?"

Until next week,

Renee


Tuesday, April 8, 2014

Ready to take your design outside?


Spring has finally sprung...I think!

I don't know about you, but for me these past few days with bright sunshine and warmer temperatures in New Hampshire have surely put a spring in my step and lifted my mood. With only a few patches of snow left to melt in my yard, I am inspired to begin designing outside!
I like to think of the outdoor spaces in my yard as an extension of my home. Here in New Hampshire, our season is pretty short so I like to be sure to make my space functional and pretty.

 However, there are so many things to consider before you head down the path (no pun intended!) to landscape design! Before I even meet with clients to discuss outdoor spaces, I ask that they do the following:
  • Make a list of needs and wants. This is important to really think about. Do your children need a place to play? Perhaps they'd enjoy a fairy garden like the one I created here?

  • If you have a dog, you may want to consider a special area just for your pet!


  • Are you thinking of having a vegetable garden? Would you like a patio or a porch? Also think about where the sun is during different parts of the day and when you are likely to be using the patio or porch. You don't want for it to be blazing hot every time you head outside, otherwise it won't get used.

  • Consider the direction of the sun and wind. Before you decide to construct a fire pit, you best know which way the wind comes from, otherwise you'll be left with a whole lot of smoke and not a lot of fire!

  • It's also a good idea to write down the types of plants and trees you love, or even the ones you don't want to see in your yard.  Are there certain colors you like, or a certain feel that you want your yard to evoke?
Today we have so many wonderful choices in indoor/outdoor rugs, furniture and accessories. It's no longer just wicker or plastic. I love to create a space that will really get used. Whether it's to host a cookout on the porch or relax on the patio there are many ways to design.

So while the sun is shining on us think about how you want to use your yard and begin creating an inviting space for the outdoor space that surrounds you. Believe it or not, designers and landscapers begin to get booked out several months this time of year. So if you are hoping to share margaritas on your deck with friends for Memorial Day, you better get planning!

May the warm sun rays shine down on you today and every day!

Renee


Tuesday, April 1, 2014

Add some splash to your bath!


We've all heard the advice by now, updated kitchens and baths are a great investment for your home. And it's true! No one wants a dated kitchen and you certainly don't want to start your day in an ugly bathroom!
 
I love to recreate bathrooms because you can really have some fun in this (usually) smaller space. I'm not afraid to mix old and new, or to utilize some spunky colors. Take this 1850's Farmhouse bathroom I designed. The last update this bathroom had seen was in the 50's. We pulled the old Formica counter and base and replaced it with one of the homeowners cabinets. We topped it with a remnant piece of black honed granite and then placed a wonderfully hefty marble vessel sink atop. The real splurge was a  chrome faucet from +Brizo Faucet to help bring a bit of contemporary to the space.
 
 
Photos by Jared Saulnier
The walls were in bad enough shape that it gave us license to throw a splash of wallpaper up to liven up the space. Classic dot tile round out the room and keep it feeling period.


Here again I mixed the old with the new in another bathroom in this family's farmhouse. It's likely that this bathroom started out as a large closet or perhaps a birthing room. We had several hutches that seemed the perfect solution for vanities. We plated the back of the upper hutch with mirror and replaced the old wood top with a honed absolute black granite remnant.
 
The splurge was on the +Brizo Faucet fixtures and was worth every penny. Combining modern with old, two mini pendants drop from the ceiling to add extra light. Classic subway tile fit perfectly with the river rock floor and zebra stripe accent. A wall niche offers extra storage place and keeps things tidy.
 
Photos by Jared Saulnier
For anyone looking to update their bath, the possibilities are endless. Consider the style of your house and the feeling you want to evoke as you start and end your day.

It doesn't have to be boring. Go ahead, make a splash!

Renee